
5 Skills to Master Photoshop Artboards for Your Next Social Campaign
When you create graphics for social campaigns, you often want to post in multiple channels like Facebook, Instagram, and LinkedIn. Unfortunately, one size doesn’t fit all when it comes to social media. Each of these channels has their own unique image dimensions that look best on their platforms. You want to put your best foot forward to get the most engagement possible from your campaign, so that means you have to create multiple versions of the same or similar graphic.
Creating different sized graphics used to take multiple PSD files, which meant swapping back and forth between them to ensure design cohesiveness. Luckily, Photoshop now allows for the use of artboards. That allows you to work with multiple canvases of varying dimensions all within a single file. How’s that for convenience?
Why should you use artboards?
- Allows you to overview multiple graphical pieces and keep design consistent
- Improves workflow (you don’t have to swap through tabs to find files)
- Keeps everything project related in one file
- Simplifies export of web ready files
Now that you know what you’ve been missing, let’s learn 5 skills to help you master artboards in Adobe Photoshop.
Step 1: Create an artboard document
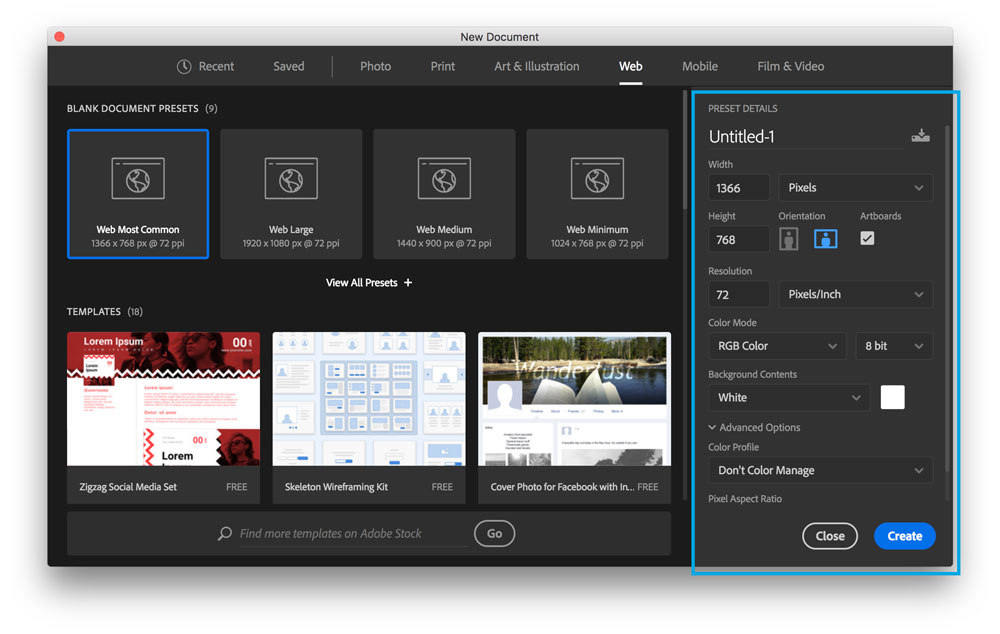
Open Photoshop and create new document by selecting File > New.
In the open dialog box, enter all of your dimensions and make sure that the Artboards box is checked.
Then click Create button.
Step 2: Add another artboard
Select Artboard tool from left menu.
Use + to add same size artboard in any direction or use add artboards button or Layer > New Artboard.
Step 3: Adjust your artboards
Rename: Double click artboard name in layers panel or Layer > Rename Artboard.
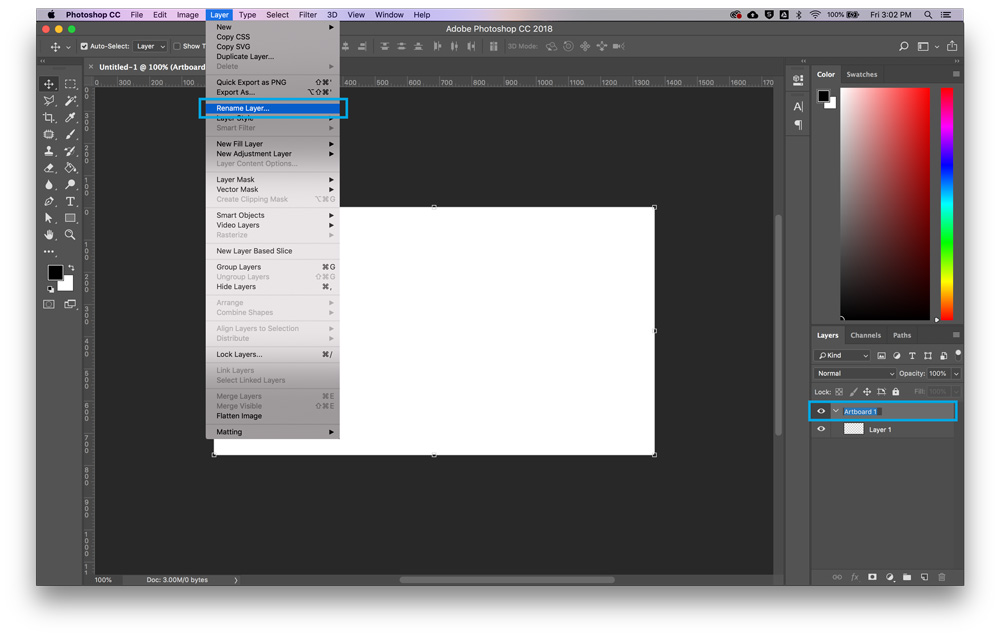
*TIP: Set up artboard names in layers panel as you want the file names to appear after saving
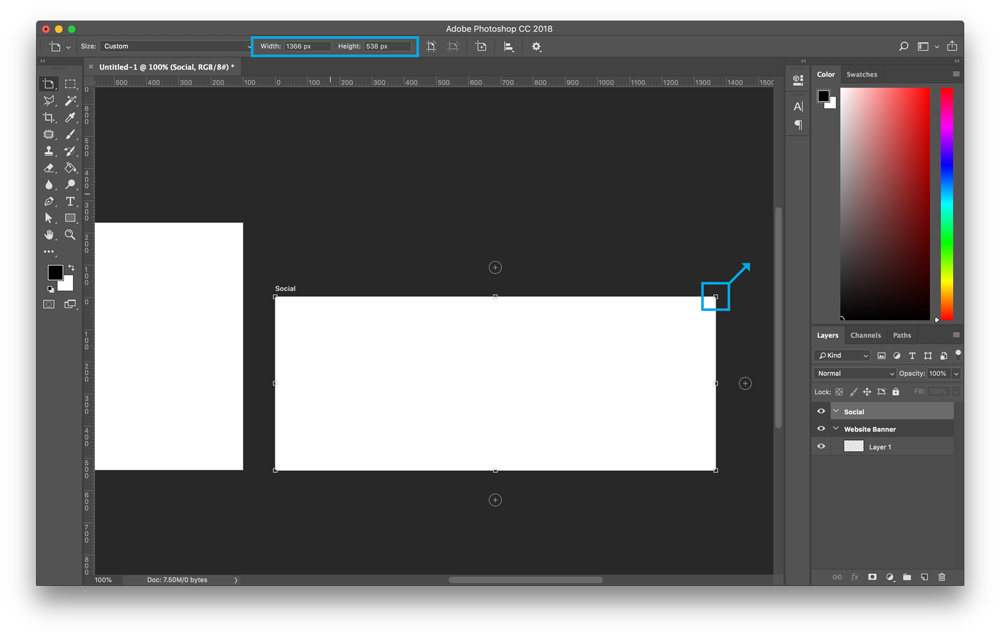
Change dimensions: With the artboard selected, use the top menu bar or manually adjust with transform arrows.
Step 4: Understand Layer Structure
Artboards are arranged in the layers panel as groups.
Be careful to make sure your layers/elements are in the correct artboard group.

Rearrange/Change Order: Select artboard name in layers panel and then drag up or down or use your arrow keys.
Step 5: Export all artboards at once
File > Export > Export As or Option + Shift + Command + W.
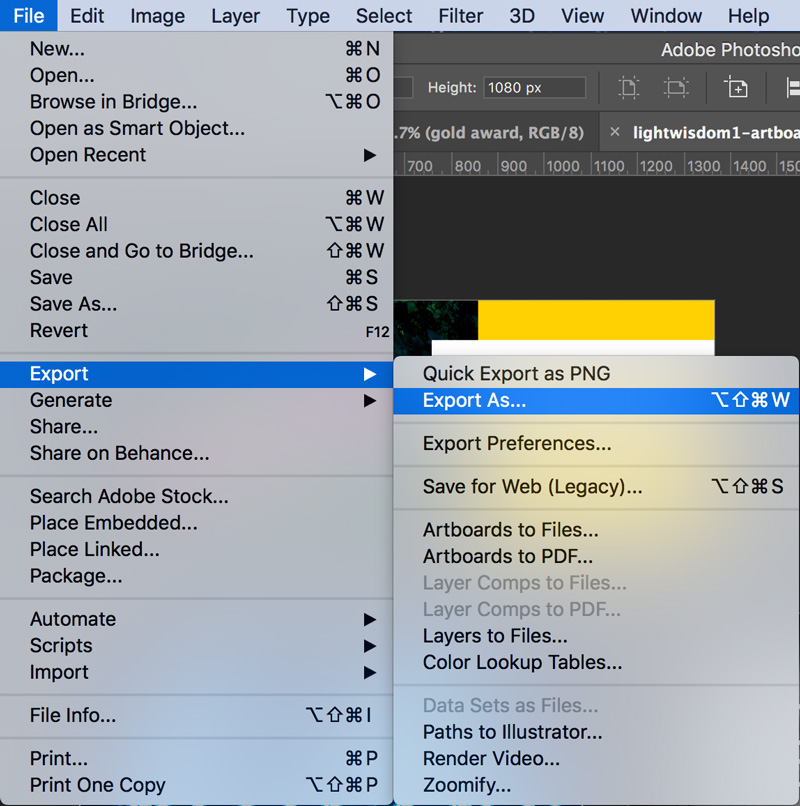
Toggle through artboards on left side and define export settings.
You are now an artboard ninja and ready to make unruly Photoshop files a thing of the past!
Or maybe you just prefer to leave it to the pros? Let our award-winning creative team at Lightspeed help you with your graphics needs. We’re only an Email or Ping away!