
Light Wisdom: Packaging Files for Press in Adobe InDesign
This might be the easiest InDesign tip/tutorial you’ve ever read. Let’s package some files!
If you work with publication, brochures, or any sort of layout projects you have probably requested packaged files or been asked to provide them. Packaging your files is crucial to ensuring that your file renders as expected when sent to someone else. When you don’t package your files, you run the risk of broken lines, fuzzy images and fonts not being installed on the system opening the file – causing a replacement font to be used. In other words – packaging files secures and protects your hard work.
Even if you don’t need the document sent to be printed, packaging final files is ALWAYS a good practice for archiving. If all final files are packaged, you can go back to them in 10 years and they’ll still be perfect and just as you left them. With unpackaged files, once you start moving images around, organizing fonts, etc on your system – your image will slowly start falling apart because it is linking out the these images and fonts. Once packaged, they’ll live locally in the packaged folder and you’ll no longer have to worry about anything breaking.
A brief overview is shown below, or check out our video tutorial here.
Quick Checklist:
- Double check document sizing and layout
- Make sure there are no broken links
- Make sure all images and all color swatches are in the proper color mode (CMYK, Spot, etc)
- Check to make sure there are bleed marks if required by printer
- Make sure all fonts are embedded and active
Step 1:
Open InDesign document
Step 2:
Go to Window>Output>Preflight to check for initial errors
AND/OR
Go to File> Package to check the Package window for errors. It is always better to be safe than sorry, however I find for most projects the Package window is fine. If you are unfamiliar with certain errors, the preflight panel spells it out a bit more clearly than the package window.
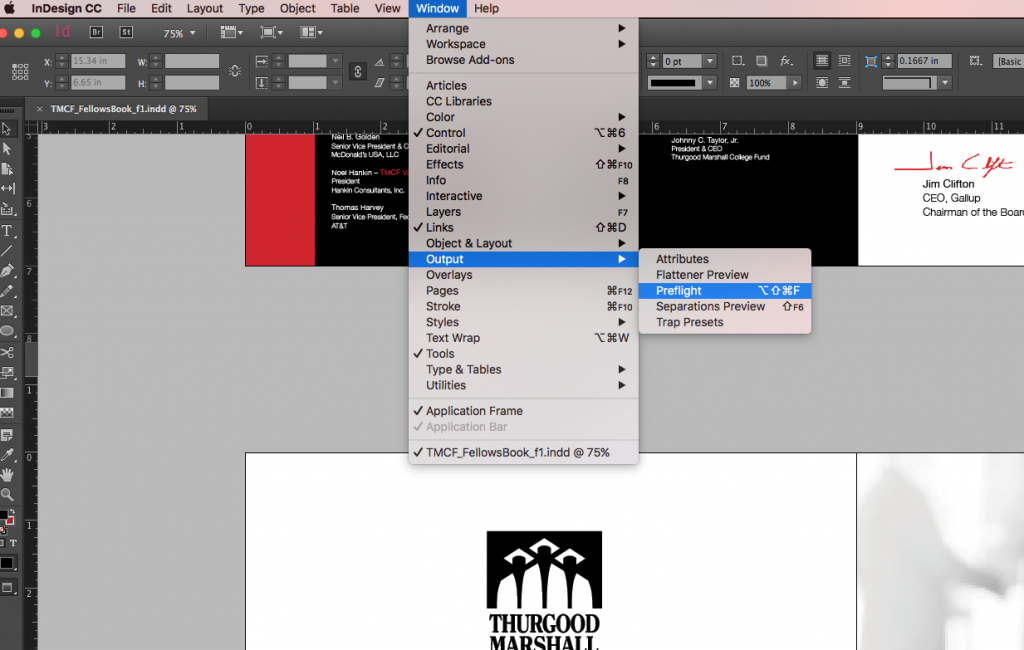
InDesign Preflight Panel – Go to Window>Output>Preflight
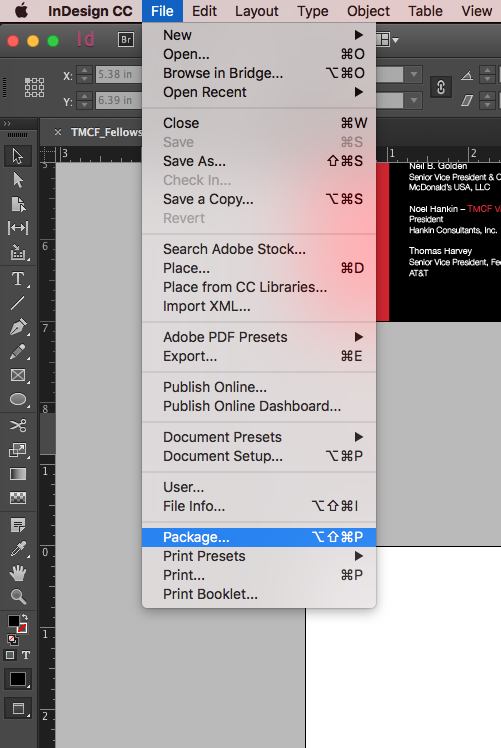
InDesign PackagePanel – Go to File>Package
Step 3:
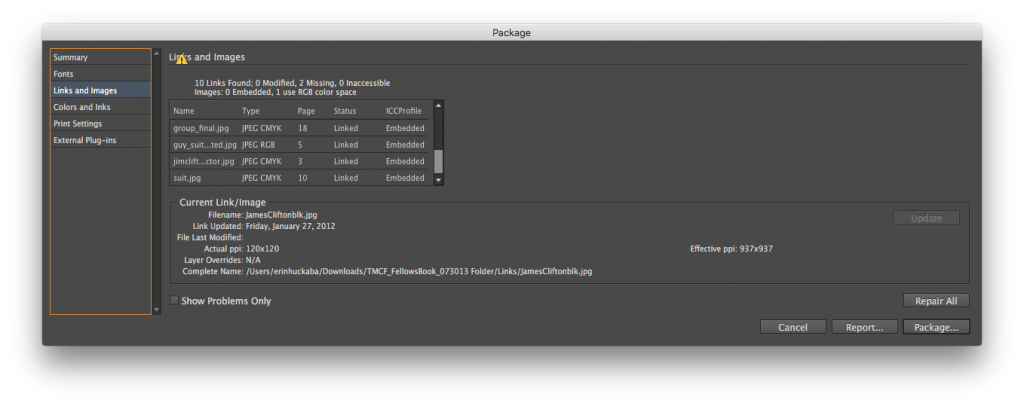
If there are errors you will get an immediate alert. Common errors are linked images missing, fonts missing, or images in the wrong color space for print – ie RGB vs CMYK.
Use the preflight and/or package panel(s) to check where the errors are in the document.
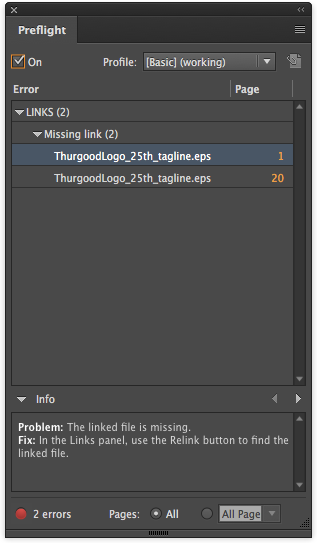
InDesign Preflight Panel – Errors
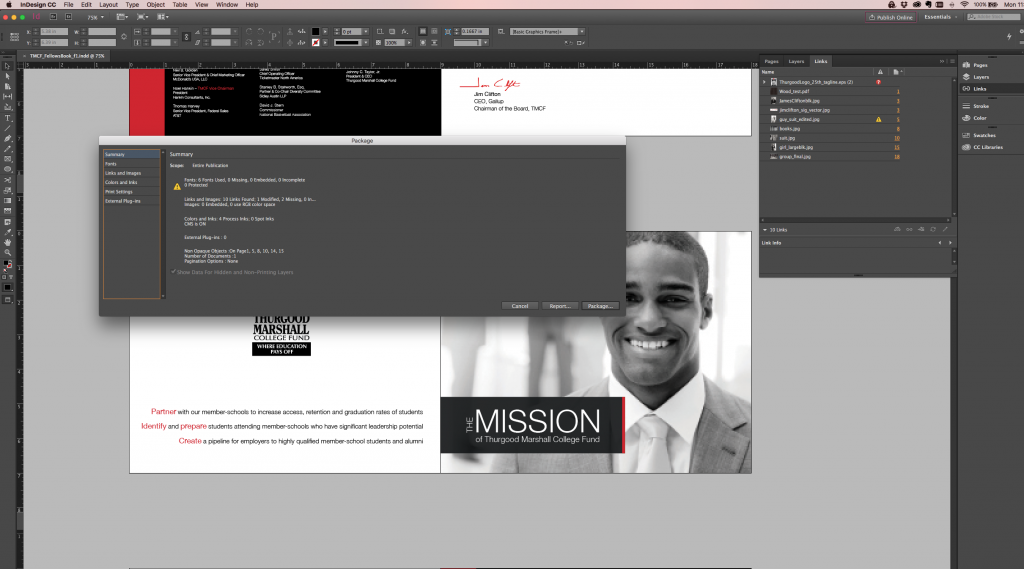
InDesign Package Window – Errors
Step 4:
Fix the issues, edit any RGB images in Photoshop and relink broken image links. This might take a few checks back and forth, especially on larger documents. There are more detailed directions in the video tutorial here.
InDesign Package Errors – RGB image
Edit RGB image in Photoshop
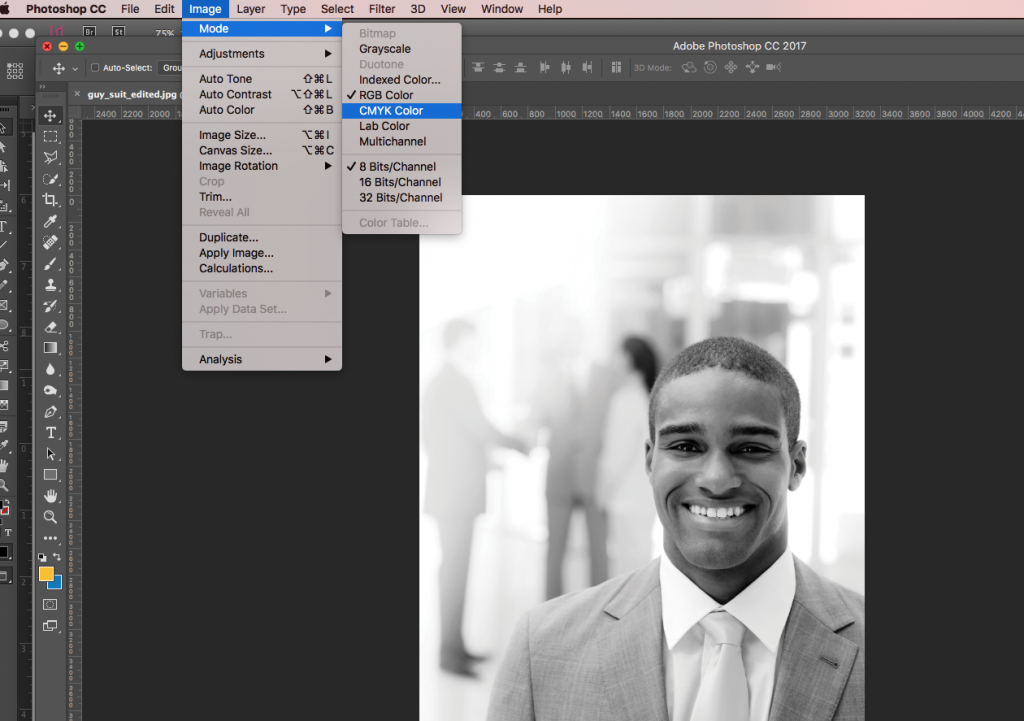
Change image to CMYK in Photoshop

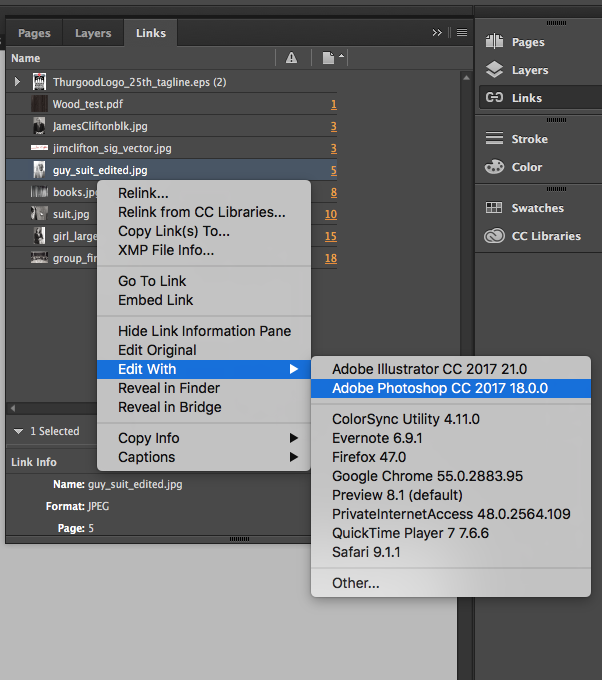
Identify missing links in InDesign panel – relink
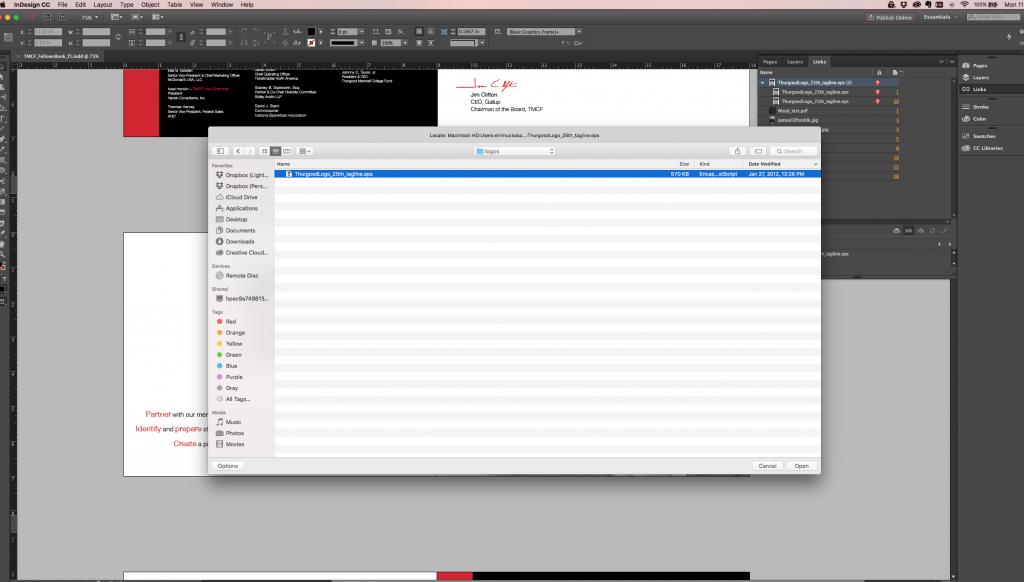
Relink broken image links – select the image files int he InDesign panel, then click on the link icon in the bottom of the Links window.
Step 5:
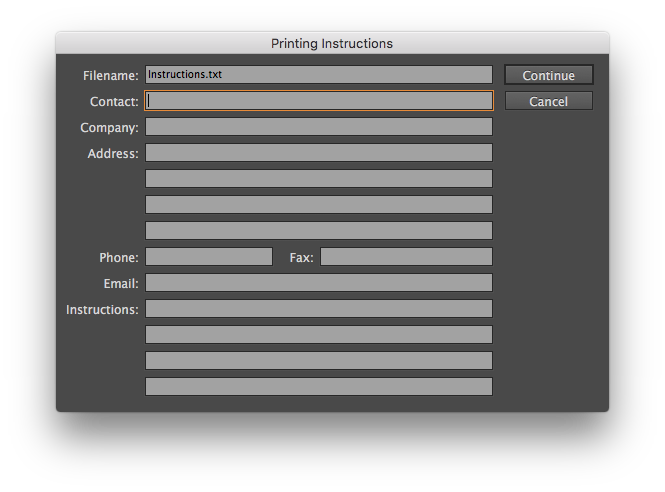
Once all issues are remedied, go back to File> Package. If there is no alert click on Package. You will be asked to select a destination and to name the package folder. Generally, a good way to stay organized is to simply add _PRESS or _PACKAGE to the end of the document name. Also, you will see an instructions panel pop up. If you want to leave details about the document, printing specifications, etc.
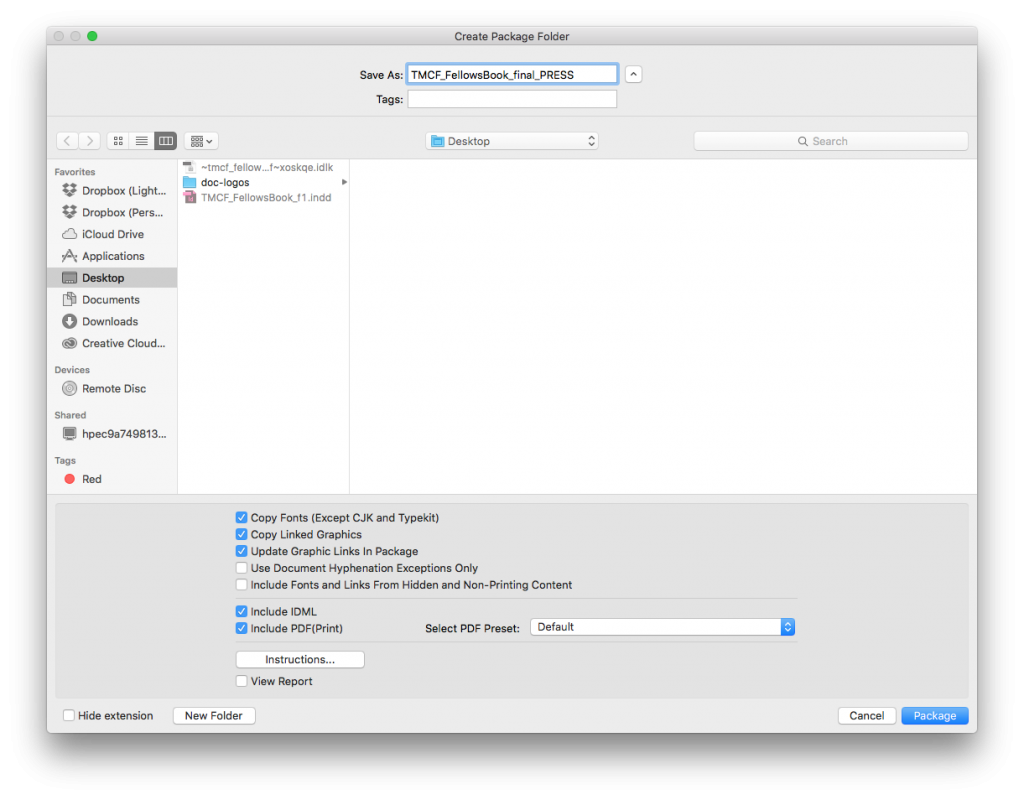
Choose a location and folder name for package
Step 6:
Double check to make sure the file packaged properly. When you open the folder, you should see the .INDD file, a .IDML file, a .txt file, Links folder, fonts folder, and a .PDF.
I always check the PDF file to make sure it is what I need for press – Or I send a separate PDF file along with the zipped packaged Press files.
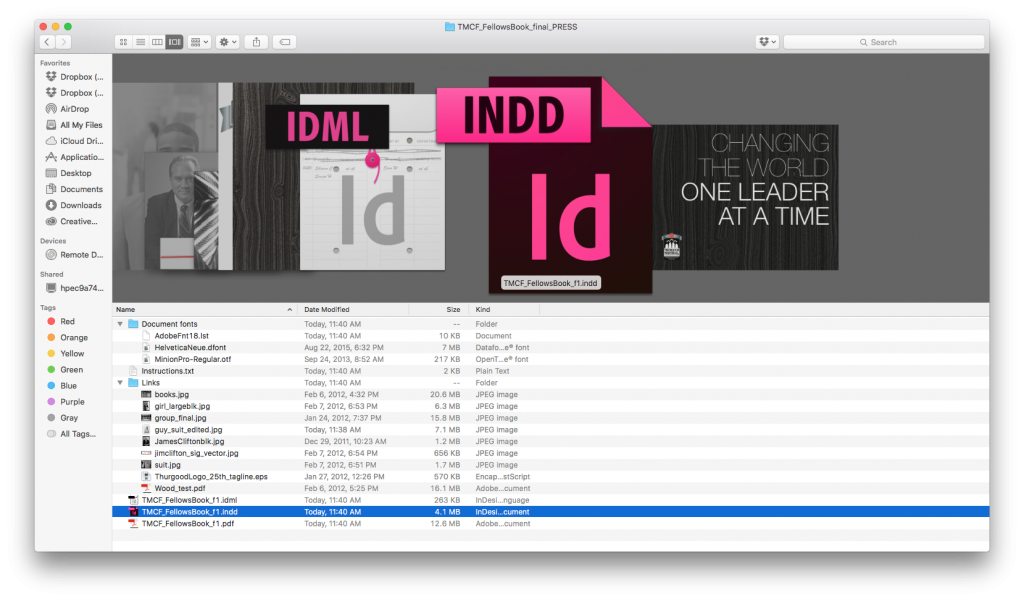
Double check your packaged files to make sure it worked correctly
Step 7:
You’re done! Zip, send, archive, do a happy dance – your files will forever be safe from broken links and janky substitute fonts. If you aren’t good with reading or if this was confusing, check out our more detailed video tutorial here.
Check out some of our creative work here.